Watch out, he’s got a label maker…

Many of the labels that needed replacement since we bought the airplane were Avery removable white ink jet labels, which means that they were black text on a white background, generally on a black surface.  In other words, they looked a little ugly.  I had a bunch of gift certificates on Amazon, so a label maker with white on clear labels was procured.  The white labels are gone, replaced with white on clear, which looks much better.

OLYMPUS DIGITAL CAMERA

The Molex edge connector pins arrived, so the autopilot / nav radio connections are all wired up and the INS Nav is installed again.  All that remains behind the panel before the annual is replacing the vacuum filter and building a cover for the big whole on the right, so it’s time to turn attention to the flaps and ailerons.  Progress on that front was restarted today with the painting of the control surface attach points.

Cleanup Night…

Started spraying the color coat on the mounting hardware for the flaps and ailerons tonight so that they’ll be ready for the weekend, should finish tomorrow.  In between coats, secured all the interior wiring that got moved around during the EDM install and the circuit breaker panel rewire.  Everything seemed to end up in the right place, so that’s good.  Still have to remove some panels and paint, but since I’m still not sure whether I’m going to redo the panel for the autopilot, I’m going to hold off on paint a little longer.  The panel on the left side of the footwell had carpet that was falling apart but the left had no carpet and was repainted a couple years ago.  Since the carpet was falling apart, I decided to strip it down and just have painted aluminum.  The carpet came off pretty easy and I’ve almost got the sidepanel cleaned up enough to paint, but still have some work to do.

I did manage to find time to get the Downer decals installed on the yokes.  I’m really happy with how those turned out…

OLYMPUS DIGITAL CAMERA

The pins for hooking the autopilot up to the Narco Nav/Com should arrive Friday, so I should be able to wire that up and install the VAL Nav again and basically be done with the wiring.  The new panel for the lights arrived but needs a couple of holes drilled, so that will have to wait until the weekend (I need to get the right bits to drill fiberglass).

George Lives!

George the autopilot is back in the aircraft.  I moved the autopilot from the big opening above the right yoke to under the left yoke.  Two reasons for the move.  First, it opens the whole second radio bay for instruments.  While I currently only have plans for a transponder’s worth of space, might as well have more just in case.  Second, when flying in the left seat, I had to reach across the passenger every time I needed to disengage the autopilot, which is basically every time I needed to switch headings or VORs.  George had a tendency to turn to the right when the pilot push-to-talk was depressed when in NAV mode, so I took this opportunity to replace the nav indicator wires with shielded wire, which should solve that problem.  Of course, I can’t test that theory until the airplane’s back in the air :).

The GPS mount is also wired up and theoretically is talking to the EDM.  I’m not sure I quite followed the directions for setting up the non-primary instruments in the EDM correctly, so this is another one of those things I won’t know for sure until the plane’s in the air.  I’m not sure why I originally ran the power cable for the GPS through the panel above the right yoke instead of straight down to the panel holding the intercom.  It’s out of the way and looks better where it is now.

OLYMPUS DIGITAL CAMERA

Gear bleeding!

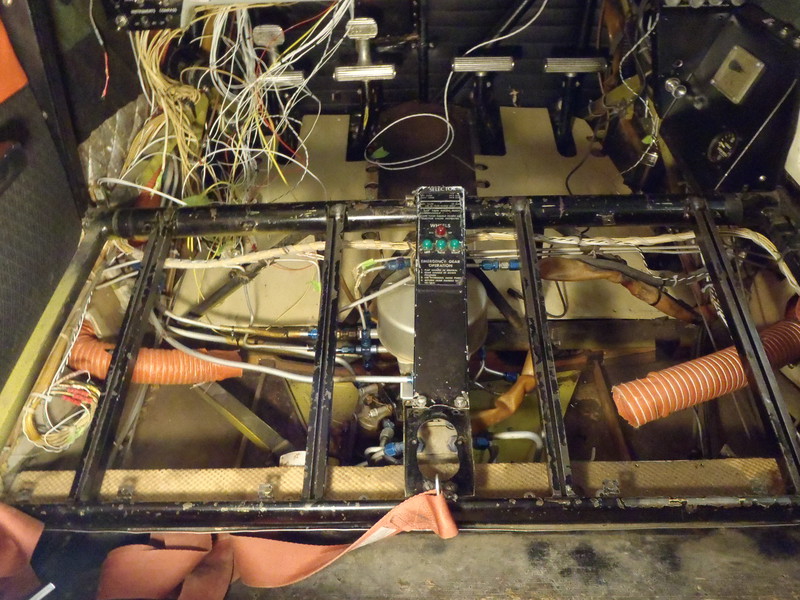
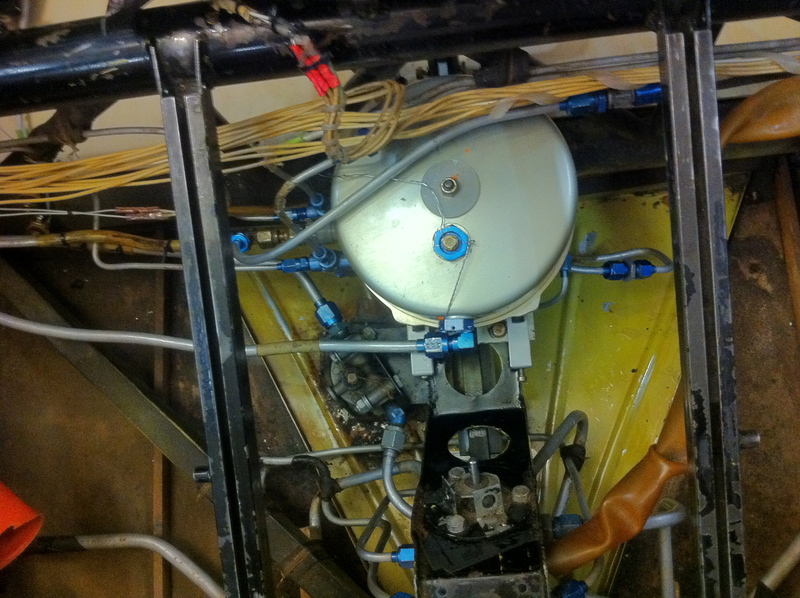
With some help from Jeff, the big accomplishment of the day was bleeding the hydraulic lines for landing gear.  It only took 4 or 5 cycles of the gear to get everything bled, which was a pleasant surprise.  Unfortunately, on the last swing of the day, the left gear safe light didn’t come on.  After a bit of debugging, it turned out that the bulb burned out.  The unfortunate thing is that it burned out between the second to last and last gear extension, so it was quite unexpected.  The Bellanca doesn’t have a gear light test switch, so swapping bulbs is the only way to check for bulb operation.

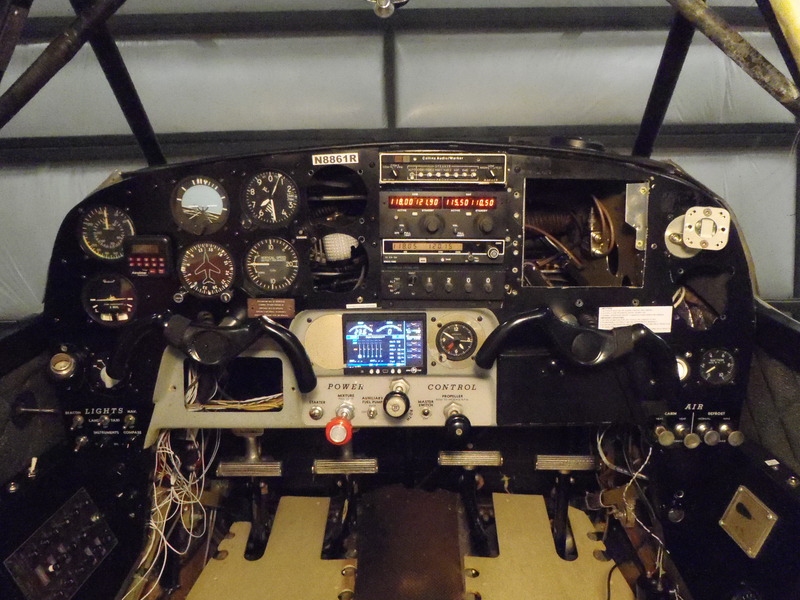
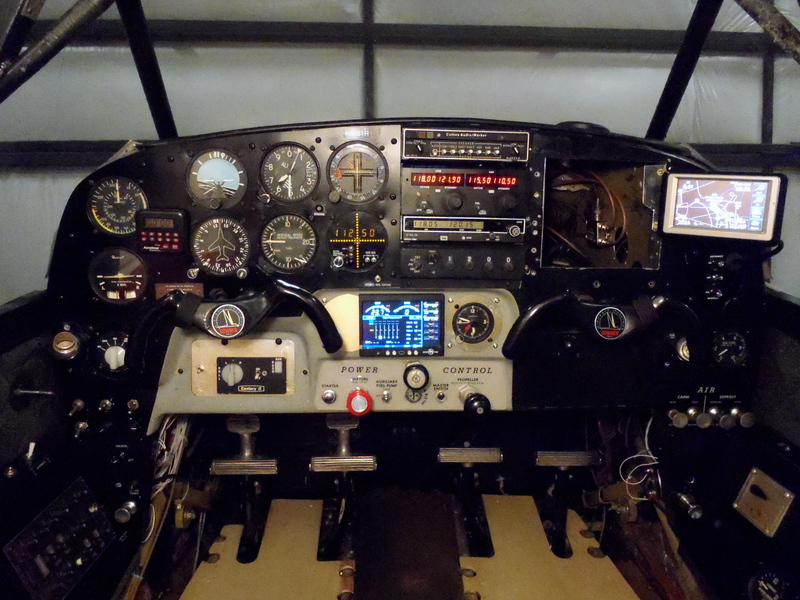
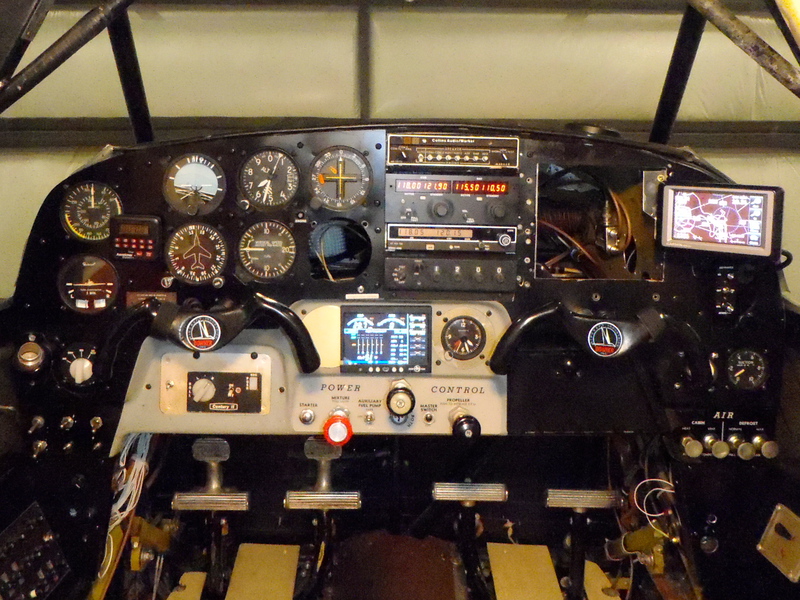
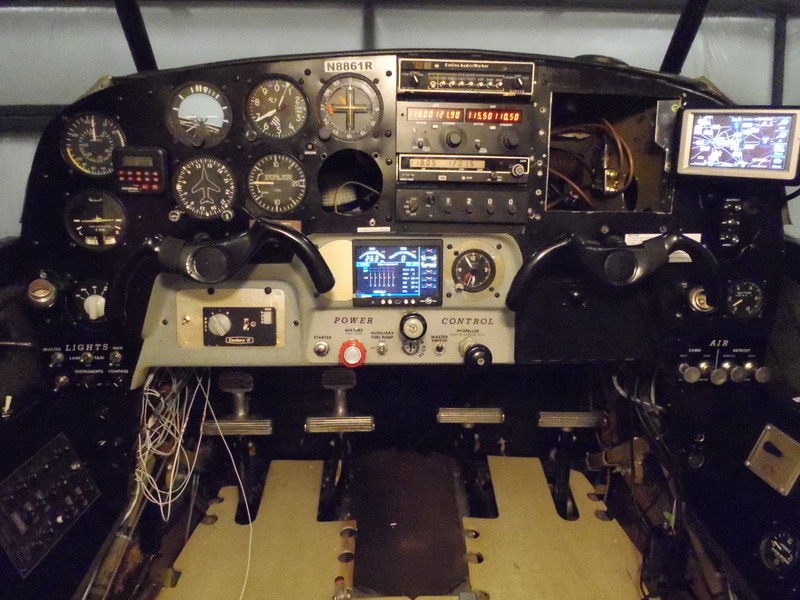
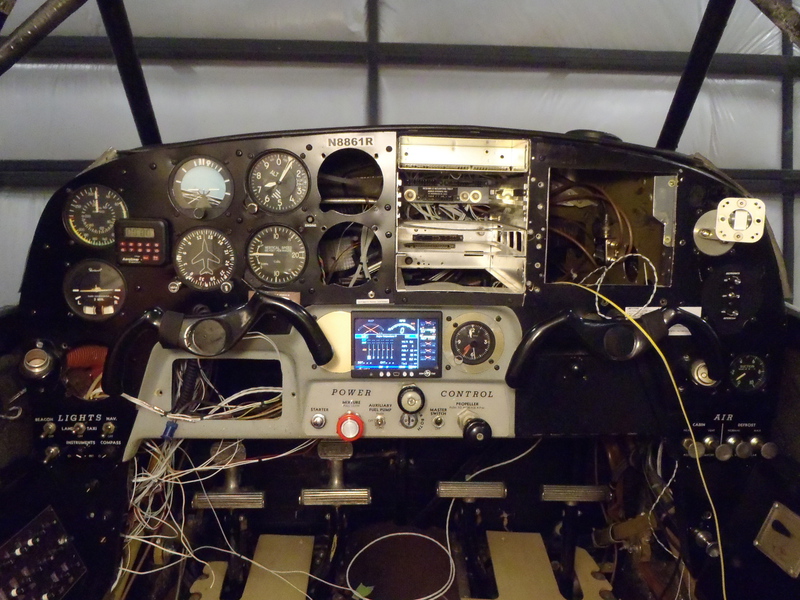
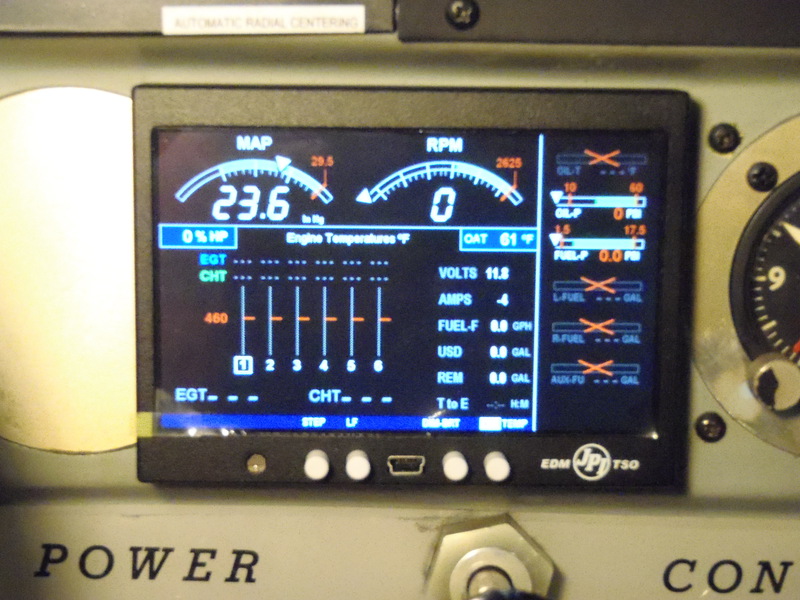
The outside air temperature (OAT), Manifold Pressure (MAP), and ammeter were successfully hooked up as well.  The MAP was a bit tricky, as I had to bend and flare a 3/16″ aluminum tube and then build up a (very) short 1/4″ Aeroquip 303 hose.  I had never done either before, so it was a bit of a learning experience.  I also verified that all three fuel level sending units are talking to the EDM, so the fuel gauges will work once I do the fuel calibration.

OLYMPUS DIGITAL CAMERA

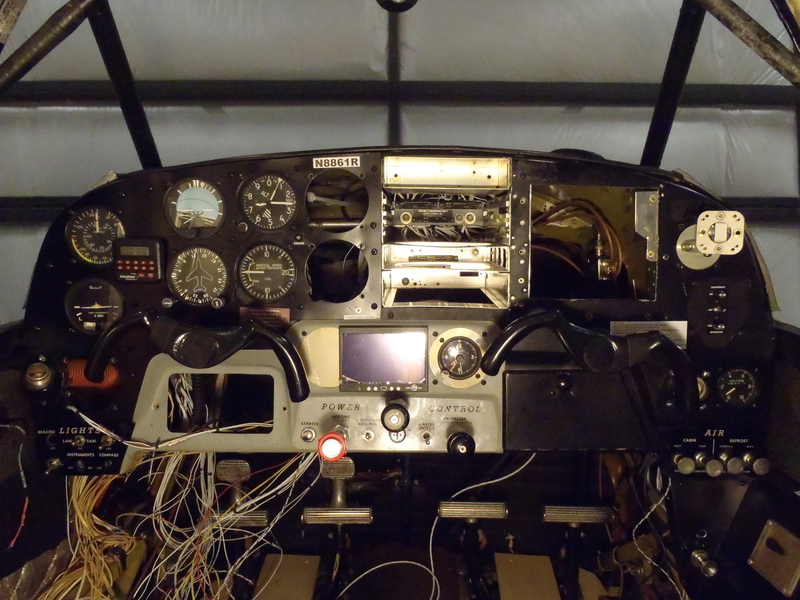
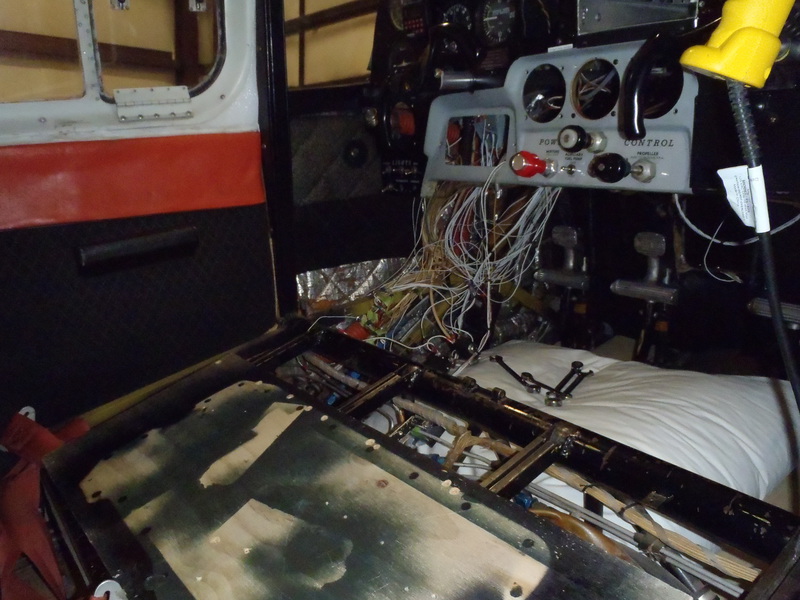
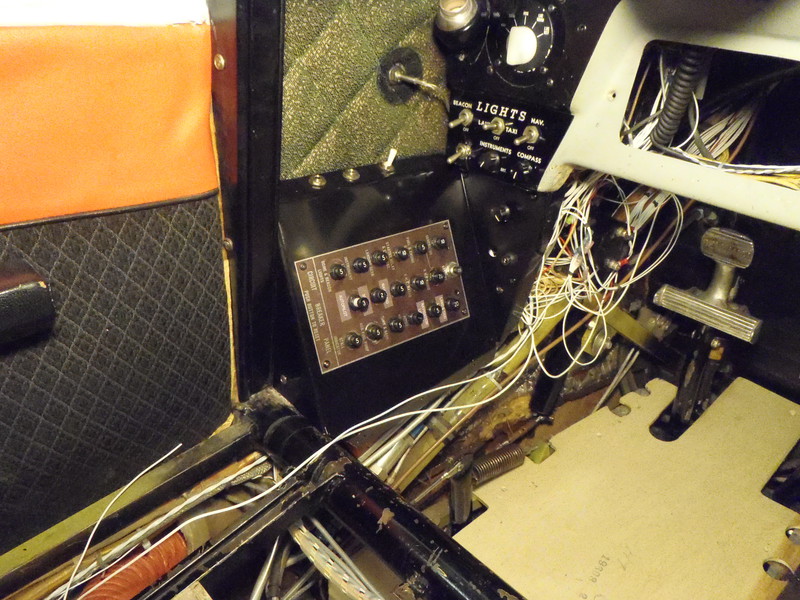
After realizing I had made a silly mistake with the wiring of the starter circuit, the breaker panel is finished.  Everything checks out and went back together fairly cleanly.  I still have to install the parking brake control cable (the hole at the bottom of the of the little triangular plate next to the circuit breaker panel.  Also need to get some white on clear labels and make up labels for the Avionics Master, the parking brake, and the intercom circuit breaker (the 2A breaker not part of the main panel).  You can also see the back part of the OAT sensor and the radio selector for the autopilot.

OLYMPUS DIGITAL CAMERA

Finally, the wire running across the left side of the panel is now back bundled together.  The autopilot panel (the big hole under the left control yoke) isn’t quite finished yet; hopefully this weekend).  I need to get some longer zip ties to finish securing all the cables behind the panel on the left side of the panel.  The intercom (far right side) panel is out and has a hole for the Garmin power cable.  The paint hopefully will be dry tomorrow morning and I can reinstall the intercom and Garmin tomorrow.  I need to wire the Garmin into the EDM so that the EDM can display MPG and fuel remain at destination, but that doesn’t look too bad.

OLYMPUS DIGITAL CAMERA

Power Up!

The remaining parts to finish hooking up the breaker panel arrived today, so I was able to wire it up and reinstall the panel.  I also installed a new wire for the strobe light, in hopes that I can quiet some of the EM noise in the intercom.  Since the radios aren’t in their racks, this is a bit hard to test right now, so I’m still hopeful :).  Almost everything powered up, with the exception of the starter/cigarette lighter circuit, which trips immediately.  So I’ll have to pull the panel back off tomorrow morning and try to figure out where the short is occurring.  As you can see, I also have to do some more work securing the wire bundle running across the left side of the panel.

OLYMPUS DIGITAL CAMERAThe JPI EDM-900 powered up just fine (woo!).  Obviously, a number of sensors still remain to be wired up, which will remove all the red Xs.  I think the fuel level gauges are inop because I haven’t gone through the calibration process yet.  Otherwise, I have a big problem.

OLYMPUS DIGITAL CAMERA


Fuel Gauges?

I need a couple parts from Aircraft Spruce to finish wiring behind the panel and to use AirTec’s shear to make some panels to cover removed instruments before I can close up the instrument panel, so hard to make progress there until this weekend.  Tonight I got the fuel level gauges wired into the EDM hardness and secured the wire bundle that runs along the front spar carry-through (since the fuel sender wires were the only things that needed to change in that bundle).  Of course, I can’t verify everything is wired correctly until I finish with the breaker panel and can power up the EDM.

OLYMPUS DIGITAL CAMERAAs you can see, there’s still some major pieces missing from the panel and a rather large rats nest of wire to be cleaned up, but the panel’s starting to come together…

OLYMPUS DIGITAL CAMERA


P-leads and wires

The only finished project of the weekend is the installation of new P-leads to replace the original ones, which were well beyond ratty and were starting to fail (one of them had to be spliced recently).  P-leads are like ignition cables for a car, but in reverse in that the magnetos are designed to produce a spark unless the rotor is grounded to itself.  The P-lead is a wire running from the magneto rotor to the switch (where it is grounded when the switch is offed).  Since there’s huge voltage spikes in the magneto (the sparks…), there’s lots of noise in the P-lead, so it’s shielded wire (which was part of what was failing).  Anyway, the new cables look halfway decent…

IMG_0251I started running all the data wires for the EDM-900 (there’s a crapload of them).  It looks like everything is going to fit, although I’m still not entirely sure how I’m going to setup the fuel flow sensor.  I need to get some smaller hose clamps to secure the oil pressure and fuel pressure sensors and put some more holes in the firewall.


Hydraulics!

The hydraulic powerpak arrived from its overhaul today, all nice and shiny.  Installation went much more smoothly than removal, probably because I khow everything fit together.  I was able to pressure check the flaps and the gear down lines and everything checked out ok.  I need to put the plane up on jacks next weekend and hook up a mule (electric hydraulic pump) to swing the gear and work all the air out of the system.  Thus far, no leaks!  Once the gear is swung, I’ll be able to remove the straps securing the gear and move the airplane around, which will be helpful when it’s time to paint the flaps and ailerons.

IMG_0238

I finished drilling out the holes for the circuit breakers from the new support panel and made sure everything fit.  It all looks good, although I need to make up some new labels, as I decided to move the landing/taxi and navigation light fuses to the bottom row and move the transponder and autopilot from the bottom row to the middle row so everything on the avionics bus is in the middle row, making the bus bars a bit easier to run.  I’ll strip everything back apart this weekend and paint everything before putting it all back together again.  Sigh.

IMG_0239


Service Letter 66 Completion

Finally completed something on the annual tonight!  I reconnected the T connections for the main fuel tanks, which took a bit of convincing as adel clamps and I do not get along.   With that, the changes recommended in Service Letter 66 to raise the fuel drains level with the bottom of the fuselage is complete.  Woo!

OLYMPUS DIGITAL CAMERAI also stripped the circuit breaker panel so it’s ready to be painted and built a backing plate for the panel since some of the old breakers had a larger neck than the Klixon breakers I’m installing.  The reducing plates and the cover plate came yesterday, so I prepped those for paint and painted the reducing plate where the autopilot selector will sit.  I still have to find a gray paint that matches the engine instrument section of the panel.


Varnish and Circuit Breakers

Tonight I applied the second coat of varnish on the flaps and ailerons.  Assuming the replacement bolts for the attach brackets arrive tomorrow, I should be able to set up the fabric this weekend.  Some repairs were required, in particular some reinforcing around the leading edge where the control attaches on the ailerons and a new stringer on the left flap (the flaps have a bend, which is a stress point on the trailing edge material).

OLYMPUS DIGITAL CAMERAI also removed the circuit breaker panel tonight (the hard part was labeling all the cables before removing them).  The breakers are all getting replaced with modern Klixon breakers (which are pullable, yay!).  I was originally not going to replace the 35A battery breaker, but the old one shattered during removal, so I guess I’m replacing that as well.  Unfortunately, over the years the circuit breakers have been replaced, sometimes requiring larger holes, sometimes not drilled in a straight line.  So I have a bit of work to do figuring out how to support the new breakers and get them straight enough to attach to a bus bar.  Again, things to do this weekend…

OLYMPUS DIGITAL CAMERA